TECH FORUM
by Jim Pasha, EXCELLENCE - May 1994
924
944 968
General Suspension Preparation
Notes and Guidelines
![]()
The 924/944/968 Porsches are blessed with some of the best out-of-box handling and balance of anyting available, despite the introduction of new and technically interesting competition from other manufacturers over the years. The performance of the 944 S2 and 968 in Street GT racing is no accident.
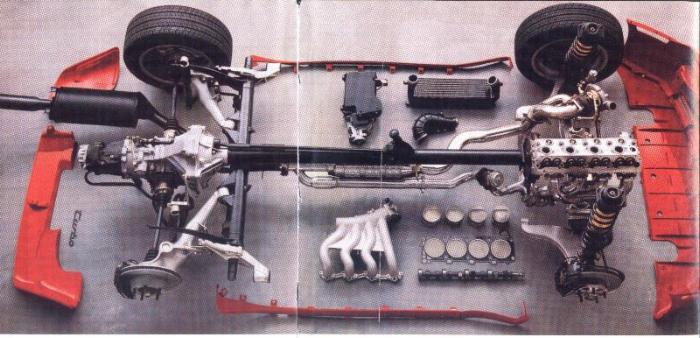
Many of us have read stories lamenting the "humble" origins of components used to construct the suspension for this series car. The joke is on the criticizer because the evolving nature of the product reveals that none of the original suspension components have survived into the present line. The original 924 used VW Golf lower a-arms (modified), Super Beetle spindles and brakes, late Super Beetle and Golf struts and shocks. The rear was almost completely Super Beetle. Today's car has evolved, using much of the same format, but has unique pieces that reflect on the constant Porsche penchant of continual improvement. This isn't too surprising considering that the 911/912/930 line has had the same level of evolution during its 30 year life span.
This evolutionary commonality is a great blessing for those owners who have early examples of each model. It is theoretically possible to install or graft 1994 968 components into a 1978 924, maybe not cost effective, but certainly within the grasp of a determined owner/enthusiast.
The biggest issue confronting the 924/944/968 enthusiasts is what to do to ensure continued or improved performance levels from their chassis as they enjoy driving their Porsches. The first issue is to get an understanding of what works for general all-around street/highway situations with a few sporting events thrown in.
The easiest place for an owner to start is adjusting the chassis to make it set in a level position. The lower sill of the body should be the same height at the rear of the front wheel opening as the height at the front of the rear wheel opening. Level is important here, not the actual ride height; I will go into that later. If you measure and there is a definite rake with the nose down, then the rear should be lowered. On all 1978 and later 924/944/968s, there is a cam adjustment on the outer trailing blade that will set the ride height. These bolts are VERY secure, and must be retightened after adjustment. The larger (adjustment) bolt is 36mm; a quality wrench is required and they must be retorqued correctly. I usually make a basic adjustment, then drive the car and measure after the suspension has settled.
This is something that the tinkering enthusiast can do by himself as long as he has a level site to do the adjustment. The more advanced enthusiast may make some more subtle adjustments, actually weigh-balancing the rear corners with those cams. I will add that this should be done after new shocks have been installed but prior to alignment.
Now why do this, you ask? Simply, this realigns the weight and suspension bias to be closer to what the designer intended. The settings that most Porsches after 1975 were delivered with, raised the rear bumper to meet U.S. bumper height requirements. The car will feel different after setting the chassis to the level position. Weight transfer will be minimized. The early 924s were perceived to have substandard brakes, but the real culprit was excessive weight transfer onto the fronts by the rear suspension ride height settings. A level 924 will feel like the brakes have been greatly improved, providing they are in good repair and adjustment. The 1976-77 924s must have the torsion bar ends removed and re-set to adjust the ride height setting as they do not have the eccentric adjustment. These models should be done by a good alignment shop; it's well worth the money.
This leads to the next issue, which is making the front suspension work.This is something that can be done on all members of this family and will enhance your driving experience by making the car more responsive. Check all front suspension bushings for wear. The front bushings wear first, then the rears go when the movement puts all the stress on them. Replacement requires a large press to remove and then reinstall the bushings. The upper bearing pivot above the the spring and strut assembly will get dirt in it. I usually drop the strut and clean it every 25,000 miles, repacking with a good moly grease. When I replace shocks, I usually use a model that has good ride control; that is, it uses increased resistance to keep the operating suspension travel within a 4 to 5 inch range. The reason for this is that all strut-based front suspensions hav some characteristics, at extreme extension and compression, that I do not want to occur as I drive. More like minimize the occurrence.
MacPherson strut-type front suspensions get toe-in at extension and toe-out at compression. Limiting the range of travel adds to the responsiveness of the car by reducing these detriments from the normal range of operation. I'll discuss this more as we go on.
Because of continuous efforts to achieve improved handling with stock components, after 18 years in production, this family of Porsches remains desirable for competive or sporting preparation of its suspension. In its stock form, even the 924 has many fine features that made (and still make) it one of the best handling Porsches.
The 944 and 968 continued the development of the basics into a finely honed and deceptively easy car to drive. This ease tends to make the average driver underestimate the handling potential of these later cars.
The purpose of this article is to explore the various options available to you for improving the suspension of your water-cooled Porsche.
The Low Budget Option
Despite the 'humble' beginnings of many of the components used in the orignial 924's
suspension, the design as executed is quite good. Your 924 and 944 have a number of
standard parts that will greatly improve handling if they are properly maintained or added
to the vehicle. The following chart defines the actual suspension components that were
available on standard models in each year. Unfortunately, there are some Club Sport items
that were available over the years and the regular Porsche documentation is rather vague
in some respects as to who got what so these components are not listed. By year and model
(Sport Options noted):
| Year/Model | F/Spring | F/Sway Bar | R/Torsion Bar | R/Sway Bar |
| 1976-1977 924 | 140 lb | 21mm | 22mm | 18mm |
|
(note: Sway bars were optional these years, standard models had none) |
||||
| 1978 924 | 140 lb | 22mm | 22mm | 14mm (opt) |
| 1979 924 | 140 lb | 23mm | 22mm 23.5 w r sway bar |
14mm (opt) |
| 1980 924/Turbo | 140 lb | 21mm | 22mm 23.5 w r sway bar |
14mm (opt) |
| 1981 924/Turbo | 140 lb 160 lb w M471 opt |
21mm 23mm w M471 opt |
23.5mm | 14mm (opt) |
| 1982-1985 924 all (from Sept 1981) |
140 lb | 20mm 21.5 opt |
23.5mm | 14mm (opt) |
| 1982-1984 944 | 160 lb | 20mm 21.5 opt |
23.5mm | 14mm (opt) |
| 1985-1986 944/924S | 2946N | 20mm | 23.5mm | 14mm (opt) |
|
(M030 opt) |
2698N | 21.5 solid or 23x3.5 tubular bar | ||
| 1987-1989 944/924S | 2946N | 21.5mm | 23.5mm | 18mm (opt) |
|
(M030 opt) |
3050N | 25.5x4 tubular bar | ||
| 1987-1988 944S | 3535N | 21.5mm | 23.5mm | 18mm |
|
(M030 opt) |
3286N | 23mm tubular | 25.5mm 25.5 tubular |
20mm (opt) |
| 1985-1991 944T | 3286N | 22.5mm | 23.5mm | 18mm |
|
(M030 opt) |
3250N | 24mm tubular | 25.5mm | 18mm |
|
1987 and later |
25.5mm tubular | 26.8mm tubular | 16mm | |
| 1989-1991 944S2 | 3250N | 26.8mm tubular | 24mm | 16mm |
|
(M030 opt) |
3120N | 25.5mm | 16mm | |
| 968 | 3250N | 26.8mm tubular | 24mm | 16mm |
Note: N=Newton. This value is as the spring is compressed to normal operating height. For height specifications, consult the Porsche Technical Specifications booklet for your model. Figures in pounds are uncompressed. Some M030 struts have an adjustable height feature.
Spring heights affect spring rates as installed. If you find a set that are used, take the entire spring/strut/spindle assembly as a unit. Shocks for those units are only available from Porsche over the counter as a special order from the manufacturer. The 1985 1/2 and later cars with alloy front a-arms have a different mounting scheme for the sway bar than the earlier 944 and 924. There is some fiddling involved but those bars will work.
As the model years have passed, the weight has increased from around 2,450 pounds of the first 924 to 3,100 of the 968. Hence, there are larger torsion bars and heavier springs on the later models. You don't have to have a buckboard ride for the suspension to work unless you have the horsepower to push it around corners. Just consider all these parts as a factory-engineered smorgasboard to develop your car with.
I you have purchased a car and find it already has the right hardware, then you have less to do. If you car only has a front sway bar or no sway bars, then read on. If your 924 is an earlier 1976-1978 and has no sway bars, then this is the toughest job. The front a-arm has no provision for the sway bar drop-link. This can be remedied by finding a pair of later a-arms with the brackets and replacing the existing a-arms. Another way would be to use a 944 (1982-1985 1/2) front bar and all mounting hardware. The studs or mounting points for the front sway bars are on the frame rails. Get all of the hardware for the sway bar while you are at it. As you can see from the table, the 23mm front bar is the largest available for the 924; this is the one you want. The mounting bushing bracket and drop-link bushings are peculiar to this bar, but the bar will mount to all early 924s. The 944/924S/968 (1982 on) have this and other size bars as an option, depending on the year.
The rear sway bar is a little more difficult. The early cars (ed note: 1976-1977 924) have the rear bar only attaching to the trailing arms; this can cause the inside rea wheel to lift under hard cornering conditions and should be changed to the later type if you are considering using the car in competition. If your car has an early style bar or no rear bar, then you will have to install mounting brackets on the torsion bar tube. There are kits available to do this, with instructions for installation. Again, get all the hardware from your source. If your car is a late car with a rear sway bar, all you have to do is check the diameter of the front bar, as many of the earlier 924s had the 22mm front bar with the 14mm rear sway bar.
Be sure and buy ALL the hardware and the bolts that go throught the rear trailing arms if your car does not have a rear bar of any type (this applies to all 924s and 944s delivered with no rear bar or the earliest style of rear bar). The mounting bolt also doubles as the camber adjuster and has a special eccentric built in. It is absolutely required to have the correct bolt in that position.
1980 and later cars with only a front sway bar have a 21mm front bar, but are equipped with 23.5mm rear torsion bars (normal was 22mm). Torsion bars should be purchased new, but used ones will work as long as they are marked for the side they came from. You can replace torsion bars yourself. The later cars require the torion bar tube to be lowered from the car which can take a lot of time and then will require an alignment (I recommend having a shop do this job as it is a 6 to 7 hour job including alignment, not a job for your living room if you haven't done it before).
As stated earlier, the car should have the rear ride height adjusted to set the car level. The early cars required the torsion bar blade to be reset; the later cars have a ride height adjustment on the trailing arms and you should have the adjusted when aligned. This hight rear stance also adds mucho understeer to the car, something we want to reduce.
Shock Absorbers
To get the most out of the stock sway bars, top off these improvements with Koni sport
shocks, Bilstein gas shocks or a quality shock absorber to fit your budget. It is a
requirement to use a shock absorber that is intended for "sport" use. I know
I'll have some manufacturers complain, but Boge, Koni and Bilstein are the only ones to
consider if you want a minimum of fuss and get out and drive the car. Those manufacturers
have two styles of shocks, normal 'sport' and real 'sport'. Use the normals if you do
street driving, sports if you compete. Don't compromise, just get the one you need.
Custom shocks from a variety of manufacturers are available, but you MUST know your application and send specs. Stick with the factory parts or replacements by the mentioned manufacturers and things will work fine.
I estimate costs as follows based upon catalogs and ads from a variety of Porsche aftermarket suppliers:
| One set factory sway bars and hardware (used) | $110.00 |
| One set shocks (Koni gas adjustable orange) | 375.00 |
|
Koni yellow are true 'sports' shocks |
|
| Mounting kit for rear bar | 80.00 |
| Lower and align (cam adjustment only @3.5 hr.) | 250.00 |
| $815.00 |
These improvements should, with quality tires, give you cornering in the low .9g range
(The Porsche factory says that they acheived .872 on their skidpad on Pirelli CN36 tires
with the same equipment and the standard alignment settings on the original 924). Note
that the improvements may be done in stages to lower the outlay at any time. Almost all of
the improvements can be done at home including the torsion bar adjustment (excepting the
1976-77 924). Alignment should be entrusted to a shop that has a Hunter or Bosche
alignment rack or equivalent.
The following is a good set of alignment specs for any 924/944/968. They have worked well over the years and yield at least 30,000 mile on street driven Yokohama AVS tires:
| Front | Rear |
| 3/4� | 1� |
| 1/16" toe in | 1/16" toe in |
| 3� caster (as close as can be adjusted, both side equal) |
A good alignment should take 1.5 hours; lowering with the cam adjustment, add an hour. The
normal tab is about $110 to $120 at shops in the San Francisco area.
This differs from the standard factory settings somewhat, but these settings will give you good tire life and handling adding to the tactile turn-in feel, something that will give you better feedback as you make a sharp turn. One of the features of the 924/944/968 suspension will cause some unusual wear patterns on the outside of the front tires when the car is autocrossed hard. This is from the negative roll radius as it is called; this is a safety feature to provide stability when a tire goes flat at speed. This feature should be left as is for these models if street driven.
The High Budget Option
(This equals the production or street prepared class in most PCA
competitive events.)
Okay, you aren't impressed with the low budget option. You want world beating handling out of your 924/944/968. Here are you options:
| 1. Change springs and torsion bars |
| 2. Lower car |
| 3. Aftermarket sway bars |
| 4. Semi-race shock absorbers |
There are plenty of choices on the market, so I am going to build parameters around some known quantities and components. The quantities are based upon successful project cars that have been autocrossed. The first thing to consider is the ultimate preparation.
Changing springs and torsion bars will give most 924/944/968s much stabler handling characteristics. The amount of body roll will be reduced and dive during braking and squat during acceleration minimized. Most aftermarket front springs will also lower your car; this can be as much as 1� inches. While this looks good, the front struts and shocks should be examined to insure that the shock does not bottom during use. Also, the rear ride height will require resetting again to make the car sit level after the springs are installed. This much height change cannot be compensated by the height adjuster on the late cars so count on having the torsion bars removed and reset to lower the rear of the car.
If you lower a car, the spring rate should go up to compensate for the reduction in ride height and suspension travel. You will be dealing with a shorter range of movement which can cause the ride to go to hell when modified. I generally keep the stock ride height unless the car is strictly a track car. A friend destroyed the cast aluminum oil pan on his 944 when he hit a rock while driving in the hills. The 1" lowering job can be expensive if you aren't careful.
What to Use
Front - Springs
are available from aftermarket suppliers in 210 lb/in and 260 lb/in sizes at stock and
reduced ride heights. I prefer to buy front springs that are designed to operate in a
lowered mode rather tha cutting the factory springs. The next best, but much more
expensive method, is to buy the 944/944T/968 adjustable perch struts and matched springs.
This is how the Club Sport 944 Turbos were set up for the Escort Series a few years back.
As a matched set, these parts will lower ride height about 1" over a normal 944/924,
but the entire front strut/spindle and spring must be used. The rear must be matched to
work correctly. This leads back to the aftermarket springs just mentioned; they are well
developed and work very well with your stock struts (not with the Club Sport unless
specifically stated). The 210 lb springs work well with a street-driven 944, as an
example. The 260 lb springs are a tad stiff and can rattle you on a concrete freeway
surface.
Rear - Torsion bars are available aftermarket in 25mm, 26mm, 27mm and larger sizes. As stated in the table, ther are some good torsion bar sizes available from Porsche. To get things into a stable state, the 210 lb/in springs and 26mm torsion bars will give you a good 'sport' feel and be a good compromise for street/autocross work, while the 260 lb/in springs and 27mm (or 28mm) torsion bars will give the best all-out performance with selected sway bars and shocks.. If you have an early 944, I can recommend using the entire rear suspension assembly from a 944T or 944S2 because the correct trailing arms and torsion bars will be in the package and it becomes a bolt-in job. Always get the spacers of the rear wheels with the assembly as this makes everything fit correctly.
Sway Bars - Fro sway bars, aftermarket 28mm front bars and 19mm and 22mm rear bars are available. These can be mixed and matched for selecting preferred characteristics. If you aren't sure which way to go, then consider the 28mm front and 19mm rear sway bar first as a starter set. A nice feature is that those bars are adjustable and allow a considerable amount of tuning. I usually start with the front bar adjustment full forward and the rear full to the rear of the bar. This gives maximum understeer so you can slowly work things to your liking at minimum risk.
A good 'sport' setup is: 210 lb/in front springs, 25mm rear torsion bars with 28mm front, 19mm rear sway bars. This will promote understeer and a more controllable terminal handling feel.
A good 'all out' setup is: 260 lb/in front springs, 26mm rear torsion bars with 28mm front, 19mm or 22mm rear sway bars (depends on terminal characteristics desired).
All of the aftermarket sway bars are adjustable; as I said, you will have to dial in the settings to suit your individual style. Remember, these aftermarket bars are intended for competitive use and REQUIRE more maintenance and care, perhaps some fiddling to install. You should consider whether the factory bars will do the job for you first as they are the easiest to install and have known characteristics. Working with an experienced shop will help; however, this can be done by an individual and will take time.
| 210 or 260 lb/in front springs | $225.00 |
| 25mm or 26mm rear torsion bars | 260.00 |
| 28mm front sway bar | 210.00 |
| 19mm or 22mm rear sway bar | 180.00 |
| Koni gas sport shocks | 400.00 |
| Mounting kit for rear sway bar (if needed) | 80.00 |
| Installation and alignment (10 hrs) | 700.00 |
| $2055.00 |
As you can see, the costs do add up for these components and labor. You can save money by doing some work yourself and finding the components on sale or used.
You will notice that I have not mentioned plastic bushings or a solid upper strut mount bushing for the suspension. These should be reserved for a vehicle that will only be used on the track. Moisture, dirt and grease will cause the plastic components to squeak, bind and prematurely wear in street use. They also cause radical changes in the transient handling responses, so getting the 'feel' after installation can be vey exciting in a negative way. Use or refurbish the original rubber bushings unless this will be for a 'track car'.
With the additional preparation, the alignment specs for the low budget option will work very well and tire life will be good. If more agressive performance is desired, then additional negative camber can be dialed in; 1�� front and 1�� rear. These provide excellent results, but aligning the car may be more difficult and tire life will suffer.
I'll go back to ride height and alignments for a moment. If you reduce your ride height by an inch, then you will lose 1" of total compression in your suspension travel. To compensate, the spring rate must be raised. Usually an increase of 15% to 20% will do it. Then we have to worry about shock travel. If you do not compensate for the reduction of shock travel, then you will bottom the shocks before the suspension has hit full bottom. I usually have the shafts shortened to bring the operating range of the pistons to where they were at the original ride height. Never set the front so low that the lower arms are inclined upward toward the ball joint. You will never get the front aligned properly and the camber gain curve will be very erratic when the suspension compresses with considerable bump-steer as you turn.
On some 911s and 914s, I've seen the fronts lowered so far that the rubber stops are the only suspension the car has when cornering. When the suspension stops tavelling, the tire is the only suspension. Since the sidewall is not very predictable on a street tire, hold on. The same remarks are true for the torsion bar fronts. Never have a front that has the body lower than the ball joint. Use shorter shocks to continue having the proper action and increase the spring rate (larger torsion bars) to maintain proper suspension travel. The rear should never be set lower than level on the trailing blades; same reason as the fronts. The 944 Turbo and S2 owners have an advantage here as the side spoilers make the car look lower at the same ride-height.
Some of the 944s and 944 Turbos in the Escort series looked very low. This was accomplished by the adjustable front struts and some careful setting of the rear and is where the factory (expensive) parts pay off.
Getting an alignment is critical. The shop needs a minimum of a 4-wheel rack like a Hunter or Bosch. A mechanic with Porsche experience is imperative to do the work. For shop owners who perform this service, make sure the car is centered and squared on the rack before you do anything. If the car isn't square on the rack, you can make all the setting you want and the car will pull to one side or the other. I like the newer Hunter and Bear racks as they will print out the actual settings for the car at the start and finish so you can compare. If you car has been lowered, there may not be enough adjustment to reduce the camber to a usable setting. Raise the car until you have enough adjustment. For track cars, I highly recommend the factory adjustable perch struts, despite their cost (944/924S/968 only.) They make it much easier to set things.
Now you may be completly confused as to what all of this will do for you. To give some
idea about what these improvements will do, consider this:
The low budget approach on my 924 was perfect for SCCA's SOLO II class
stock wins (I did use Koni sport shocks, allowed under the rules). In 1985 the car was the
top in class for the San Francisco Divisionals and the class season win (11 out of 16).
This approach will make your stock 924 handle better than delivered and amaze any late
Corvette owner in the turns. As I stated before, I highly recommend this approach for a
street-driven Porsche.
The hight budget option will, with any good tire, get you skidpad figures of .95g+ and more. Quite a bit of what is being recommended is very similar to the preparation of the Escort Series 944/944 Turbos.
TIRES
This brings us to the icing on the project - tires.
Tires are very important in making the suspension perform. If you want all-out performance, here are your basic choices:
| Manufacturer | Model | Sizes |
| Goodyear | GS-C V or Z | 205/50 etc-14/15/16/17 |
| Bridgestone | RE 71 | 205/50 etc-14/15/16/17 |
| Hoosier | 205/50 -15 | |
| Yokohama | A001R or A008R | 205/60 etc-14/15/16/17 |
| BF Goodrich | Comp T/A | 205/50 etc-14/15/16/17 |
| Pirelli | P7 or P700 | 205/50 etc-14/15/16/17 |
| Dunlop | D40, etc | 205/50 etc-14/15/16/17 |
| Mickey Thompson | Competitor | 205/50 -15 |
| Toyo | F-1 | 205/50 etc-14/15/16/17 |
I left a few models and manufacturers out, but the above will work best and offer both cost effective and expensive solutions to the tire decision. There's plenty of room for 275/45s under your fender, but you also need real horsepower to put the larger sizes to work. For my own cars, I'm using Yokohama A008Rs for autocross and Toyo F-1s for the street. For those of you with 924 14x6 inch wheels, the A008R in 205/60-14 size is probably the best bet at the time this is written. Hoosier and Mickey Thompson have excellent tires for autocrossing, but the sizes and availability are restricted. Wheel sizes for the 944/968s should be 7" fronts and 8" rears, though 8" fronts and 9" rears work with 16" & 17" 50 series or shorter height tires. The cars with power steering have an advantage because the wider wheels and tires require major effort at low or parking speeds.
Remember, if you upgrade the suspension and make the whole package stiffer, you must use a street tire that has characteristics that work with your upgrades. A cheap or non-performance tire will be dangerous as it will do strange things when put to the test. Tires aren't something to save on after doing serious suspension work. If you raise the spring rates, you will need a stiffer sidewall tire. You may need to go to a 16" or even a 17" wheel/tire setup to get the most from the car; be aware of this necessity. The best practice (usually) is to check out a car that is already done and drive it. See if you like the way it's done, then make your plans accordingly.
Some caveats and considerations. This is intended to be a "What-To" article
to give some insight as to what will put you into a proven set-up with a minimum
of fooling around. Here are a couple of rules you shold follow:
1. You should only change shock absorbers/springs/torsion bars/tires in a minimum of set
pairs (i.e.: fronts, rears)
2. If you lower you 924/944/968 by changing components, do both ends of your car at the
same time. Otherwise, unusual and potentially unsafe conditions may result.
3. Do not cut or heat stock front springs to lower the front of the car (just some sage
advice).
4. Sway bars should be checked for binding and/or unusual bushing wear after a short
period of use. Recheck at oil changes.
5. When aligning a 924/944/968 and setting ride height, do not lower the car too far and
check the shock absorber travel and coil spring bind. Select camber settings that will be
appropriate for the use of the car. Check for unusual behavior and correct as soon as
possible.
6. Do not use public highways to debug your new suspension settings. Street surfaces vary
as they are selected for longevity rather than stickiness and will provide a real negative
result if you blow it. Try a local autocross site or place that has enough room for a skid
pad and can be isolated from the public for your debug session. Get the new feel slowly so
that you can enjoy the changes made.
How to remove and replace components on you 924/944/968 is covered best in the Porsche shop manual or in Hayne's Owners Workshop Manual for 1976-82 924 and 924 Turbo and 1983-1991 944.
These manuals give the best step-by-step procedures for component repair or replacement of the suspension components described in this article. The Haynes manual also lists stock settings for your reference.
Have fun and good luck!