TECH FORUM
by Jim Pasha, EXCELLENCE - October 1999
924and Early 944
Dash Replacement
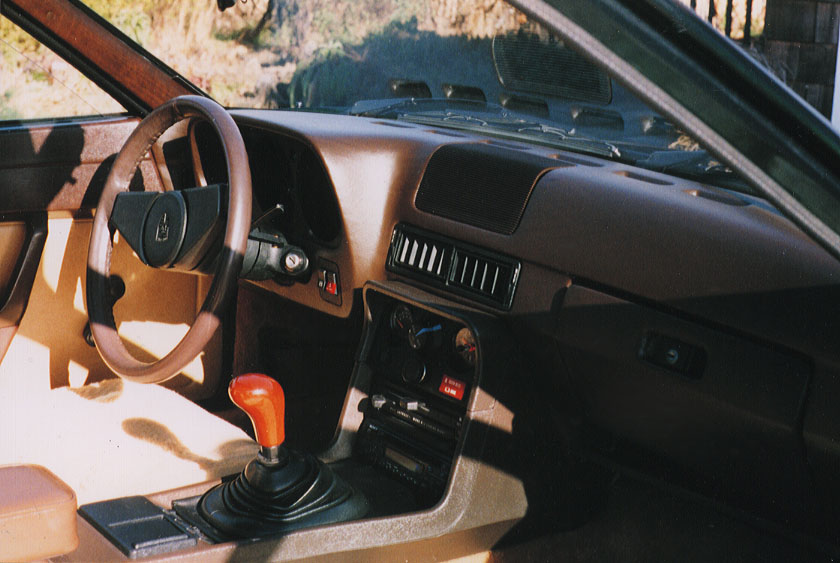
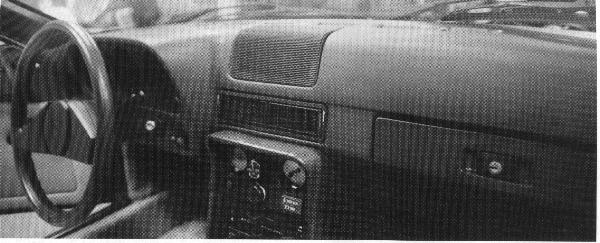
In any car, the dashaboard is designed to provide safety as well as functionality, placing all of the controls and instruments within easy access of the driver. At the time of the 924's introduction, the dash was hailed by most reviewers as efficient and easy to view.This same basic dash design was used from the initial 1977 924 until the midyear 1985 944. It was reintroduced on the U.S.-specification 924S for 1987-88. However major changes were made to the late 1982 924 dashboard that reflect features found on the 944.
A major task facing any 944 owner is keeping the vinyl covering of the dash from deteriorating. Over the years, many924s and 944s have suffered from cracked dashboards. This tends to cause depreciation, not to mention frustration at having to look at a cracked dashboard while driving. Many fixes have been concocted to remedy this visual appellation. Dash covers of cheap PVC, carpets made into dash covers, and patch kits to try and repair the cracks have been offered, but rarely are the results satisfying. We decided to try something that a vendor in the Los Angeles area offers: a stripped and rebuilt original dash complete with new, rugged vinyl in the original grain and finish. The vendor is Just Dashes, at (800) 247-3274 or www.justdashes.com .
Why go to the trouble of investing time and money on a car that might have limited value? These cars are Porsches, and the ones that fall into the hands of enthusiasts will likely be well cared for, meaning that a cracked dashboard just won't do. Many owners do their own work, as they consider working on their Porsches part of the hobby.
How good is the quality of the dash recover? If you are into concours and participate in the Preservation or Restoration classes of PCA, the rebuilt dash affords you a good way to get an almost exact duplicate of the original on the original dash backing. The five or so redos I've seen are very difficult to tell from the original dashes, excepting for their lack of cracks.
For those of you with the desire to replace the dash in your 924 or early 944, the cost of the recovered dash is about $550. Considering that the factory units are advertised for between $800 and $1,100, the recovered dash makes a lot of sense. Just Dashes uses a complete vinyl overlay on all the vinyl dashes it dies. This is a piece with a woven backing that resists shrinkage. The factory takes a thin vinyl overlay and molds it to the contour it needs in a hot mold. There is no strength in the factory overlay, which is why the dash is susceptible to shrinkage and heat damage.
Getting Started
For our project, we used a 1978 924 with a Mocha Brown interior, which presented the
possible problem of an incorrect color match. The vendor recommended that we send a core
for rebuilding, so I went to a local dismantler and obtained a 1984 944 dash. The
dashboards are physically the same. It took about eight weeks to get the dash back from
the vendor. Onces it was back, we compared the color match and the grain and could find
almost no difference between the orignial finish and the recovered dash.
For those who are terrified at the prospect of replacing their dashboards, it is important to note that no special talent is required - just patience, some basic tools, and a day without interuption. Other good things to have around are a note pad and a Polaroid or a digital camera to record things like connections, the position of wires, and other details for assembly reference.
After receiving the recovered dash, I began preparations to remove the old dash. The first order of business is to disconnect the battery. Do not attempt to do this job with the battery hooked up because there will be loose wires everywhere while the job is in process. The next step is to remove the windshield post covers. There are a couple of plastic plugs that must be removed; it is a good idea to have a storage spot for these small pieces. The uppermost screw on these covers is at an almost vertical angle. It'a Phillips screw and you'll have to fish around for it. Once the two screws on each side are removed, gently pry each cover off the post, top first. Wiggle them out and off. You will then see a metal bracket with another Phillips screw near the base of the post. This is one of the dash mounting brackets, though it's not time to remove it.
There is a speaker grill in the center of the dash. It is removed by prying at each corner with a putty knife or broad-blade screwdriver. On the 924, there is a speaker that must be removed under it while the 944 just has an empty space under the grill. Once the grill is removed, a 10mm nut over a large flat washer will be visible. This is the center upper mount. Do not remove it yet.
In order to remove the dash, the steering wheel must be removed. This is accomplished by carefully pulling the center pad off of the wheel and using a 24mm socket to loosen and remove the retainer nut. The wheel can be wiggled off once the nut is removed. The directional signal/windshield-wiper switch assembly must also be removed.
The outer cover around the switch assembly must then be removed. The later cars have a two-piece cover with small Phillips screw that are accesible from the underside. The early cars have a cover which is basically one piece. You will have to lay on your back to unplug the wiring harness from the switches. On the Lambda sensor equipped cars, there will be a box under the steering column which is in the way and has to be removed to get your hand in there to unplug the harness. Now the four screws around the switch assembly that are visible from the driver's seat can be removed along with the covers.
The ignition key must be inserted to pull the switch assembly off. After inserting the key, turn the ignition to the "on" position. Then remove the 6mm bolt from the assembly. It is accessible from under the dash through a round hole for allen wrench access. Once the bolt is out, the switch assembly can be pulled off and set aside.
The instrument cluster has two screws holding it to the dash. Both screws are on the upper side of the cluster. After the screws have been removed, the cluster can be pulled out part way and the speedometer cable can be disconnected. After the speedometer is disconnected, you will see that the harness on the cluster can be unplugged. Unplug the harness and set the cluster aside. The headlight switch, emergency flasher, and rear window defroster switches should be unclipped from the inside and left of their respective wiring harnesses. The main clips for those bezels are easily reached through the opening for the instrument cluster.
Move back to the passenger's side. If you have the later factory air-conditioning system, there is a cover over the blower and other pieces that must be removed. Note which screws were used and their location. Once the cover is removed, the glove box must come out. There are screws around the perimeter. The glove box lamp should be disconnected at his point. The glove box will pull out once the mounting screws have been removed.
Removing the center console can be difficult. First, remove the ashtray. Once that is gone, there are two bolts holding the console rear to the driveshaft tunnel that are visible. Remove them. On 944s with the cassette console, remove it at this point. There are four screws that secure it. The bottom inside cover has to come our in order to find them. Next, the auxillary instrument cluster must be removed. The 924's cluster has two screws and a couple of clips to release in order to get the piece out. The screws are easy, the clips at the bottom of the cluster are a pain. Just be patient. The 944's cluster has two very small Phillips screws retaining the bottom. They are just above the heater/blower controls.
If your car has air-conditioning, the switch in the center console can be left in place while removing the guage cluster by removing the knob (which uses small allen screws in most cars). A nut that resembles a large washer around the switch shaft should now be visible. Loosen and remove this, leaving the switch in place. There are two connectors behind the upper console; both should be disconnected at this point.
The remainder of the wiring is small and complex, so I recommend making a diagram of which color wires and what connectors go where. The clock and cigarette lighter have discreet wires. The seat belt warning light has its own connector as well. If you have a 924/944 with fog lamps, you can unclip the switch and reclip it without removing the wires. The heater/blower control is held in place by plastic clips. First, the plastic knobs need to be pulled off the levers. The plastic clips must be gently pried to remove the cover from the control panel. There are four screws retaining the panel to the console frame. Remove them and work the panel back and away an inch from the console.
The radio does not have to come out if it is a factory installation, though the front cover and faceplate must be removed. The retaining nuts are under the radio knobs, which are easily pulled off. Remove the nuts and then the faceplate come loose. On cars equipped with a console-mounted fader switch, this will have to be disconnected as well. If the console has carpet, the carpet should be removed to gain access to the shifter boot.
Next, pull the shifter boot from the lip around its opening in the console. Pull the boot free from its hole in the console, but do not pull it off the shifter. If your console has auxiliary switches just forward of the ashtray, they should be popped loose and the connections noted. After this is completed, slide the ashtray lamp forward to free it. There are two screws, one on each side (low on the console) that must be removed. Next, return to the top of the console and remove the two screws holding the console to the dash, keeping these screws segregated from the others because they are different. The console can now be worked back and away, then removed over the shifter boot.
At this point, the dash is ready to remove. Under the dash, on each side of the console location, are two metal braces. Remove these and keep their screws separate from the others. The two Phillips screws on each door post can now be removed. Directly below and under the dash are two more Phillips screws. These screws may take a moment to find, but are easily reached with a short, stubby screwdriver.
The last fastener to remove is the 10mm nut in the center of the dash. After this nut is out, pull up and back on the dash, removing the heater/defroster ducts with the dash. The hoses will (should) drop off. Be careful when pulling the dash out of the car. There are steel brackets on the back that can damage upholstery and cut you.
Now you can see all of the stuff the dashboard hides. In the center of everything is the heater/defroster/air-conditioning evaporator. If you need to service any of this, this is the best time. Do note, however, that the blower fan is removable from the engine compartment without all of this work. The heater core is on the right and at the top of that assembly. It is not easily reached when the dash is in place.
The 924 shop manual does not have any real instructions for dashboard replacement, though you will find instructions for servicing the directional signal switch and ignition, the heater controls, the radio, the 1979-and-later air-conditioning system, the instrument cluster, and many other small things. If you examine all of these, you will find everyting mentioned here, but not in an order that would be helpful for a dash replacement project.
Installing the Replacement
Inspect your new dash. The opening on my sample were a little tight as the new vinyl is
much thicker than the old. I had to carefully trim around the switch bezel areas and the
duct openings to ensure that everything would still fit. This is very important and should
be done as you do the vent ducts and install the switches in the new dash. The vent ducts
will still be in the old dash, so carefully remove all of them and transfer them to the
new dash. There is a tie-wrap on the passenger's side vent duct, so be sure to replace
that on the new assembly after installing the duct. There is also a piece of felt on the
front of the old dash (if it has not been replaced) that cushions the dash against the
windshield and prevents squeaking. this can be peeled off the old dash and re-glued or you
can make a new one. The assembly is basically the reverse of disassembly, though the job
might take a bit longer because this is a good time to clean everything before you install
the new dashboard.
After you place the new dash in position, the 10mm center nut is the first fastener to attend to. But I recommend getting a rubber grommet to place on the face side of the dash, under the large washer. this allows the dash to flex a bit and not receive stress pulls against the backing material. All factory replacement dashes I have installed have received this and none of them have cracked in the center area. Once the center nut is installed, then replace the Phillips screws on the sides, partially tightening them. Then attach the under-braces, tightening them fully before returning to the sides to tighten the top screws first, then the bottom ones.
Once the dash is securely mounted, dash switch installation can be done and the bezel
fit can be checked and adjusted. Be careful not to force the bezels, as they can be easily
broken. Problem areas in refitting the new dash that you can expect:
- The two lower forward console screw holes will be hard to locate and the screws will be
tough to restart,
- The radio wiring is bulky and always in the wrong place when you reassemble the console
- The two upper console screws go into a metal backing on the dash. Use a pick or awl to
locate the holes in themetal. Be sure to not overtighten the screws and strip the hole.
- Remember to string the console wires first and properly install the ashtry light. If the
bulb is in the wrong location it burns the console plastic.
- If the heater control panel needs to be repaired or replaced, this is a very good time
to do it. The same applies to other parts of the heater assembly.
- Have a wiring diagram handy just in case you aren't sure what goes where. Taking
pictures should be considered for this kind of a project. The Haynes 924 manual covers all
model years, while the 944 manual covers these cars as well.
- The speedometer cable on all but the 1976-77 924s has a bit of slack in it. Push it in
towards the passenger compartment from the engine compartment to give you more slack to
work with when removing the instrument cluster.
- If you have any dead dash lamps or console lamps, replace them now.
- If you have a 924 and want the later 944 heater/ventilation system, it's a two-hour job
to complete this upgrade with the dash out. You will need all cables and the fan's wiring
harness. The wiring diagram is in the 944 manual and is similar to that of the 924.
- The lamp in hte glove box has a spring clip retaining it. When removing this, gently
work it out of the formed glove box and then remove the wires. They have different sized
pins, so they cannot be installed incorrectly.
- Inspect the plastic electrical part of the ignition switch for any signs of being
burned. It only takes two minutes to change it at this time.
- When installing the directional signal/wiper switch assembly, be careful not to bend the
flat pins protruding out of the back side.
When you have completed the installation of the new dash, reconnect the battery. Carefully inspect everything and try all of the electrical accessories and instruments to ensure proper operation. Then start the engine to complete the inspection. Finally, go for a drive and admire you new dash. Then pat yourself on the back for doing a good job and for enhancing the resale value of your Porsche.